
How to Fix Blurred AI Product Photo Shadows
If you run an online brand, you know clean imagery sells. But when automated diffusion models spit out messy, muddy gradients instead of grounded contacts, you need to know how to fix blurred ai product photo shadows before your storefront loses credibility. When an object lacks physical grounding, shoppers notice in a split second. The item looks like it floats in empty space or looks like a cut-rate counterfeit, quietly draining your checkout conversion rates.
Table of Contents
- Why Generative AI Produces Blurry or Muddy Drop Shadows
- Diagnosing Edge Bleed and Inconsistent Shadow Falloff
- Quick Workarounds to Fix Blurry Shadows in Real Time
- A Step-by-Step Pipeline for Crisp, Photorealistic Shadows
- Best Practices to Prevent Shadow Artifacts Across Large Catalogs
- Scaling Studio-Quality Visuals Without Sacrificing Brand Integrity
Human vision relies heavily on contact shadows to gauge weight, texture, and distance. In product photography, this is known as ambient occlusion—the tight, dark sliver of shade directly beneath an object where surfaces meet. Generative AI models often smear this boundary. The neural network tries to blend the foreground item with the synthetic background, but it averages pixel clusters across latent diffusion steps. What should be an authentic, crisp shadow turns into a hazy grey smudge that looks like cheap spray paint.
Store owners notice this friction immediately when scaling their catalogs. As highlighted in a practical Reddit discussion on e-commerce shadow consistency and rendering speed, founders love the speed of AI backgrounds, yet fuzzy drop shadows frequently force them back into manual Photoshop adjustments. That extra labor destroys the efficiency AI promised in the first place.
Shoppers might not understand lighting physics, but their brains register visual shortcuts as red flags. When you fix blurred ai product photo shadows, you instantly restore physical depth and authenticity to your catalog. Clean, sharp contact lines give merchandise tangible weight on the screen, reassuring hesitant buyers and protecting your margins.
Why Does Generative AI Produce Blurry or Muddy Drop Shadows on Products?
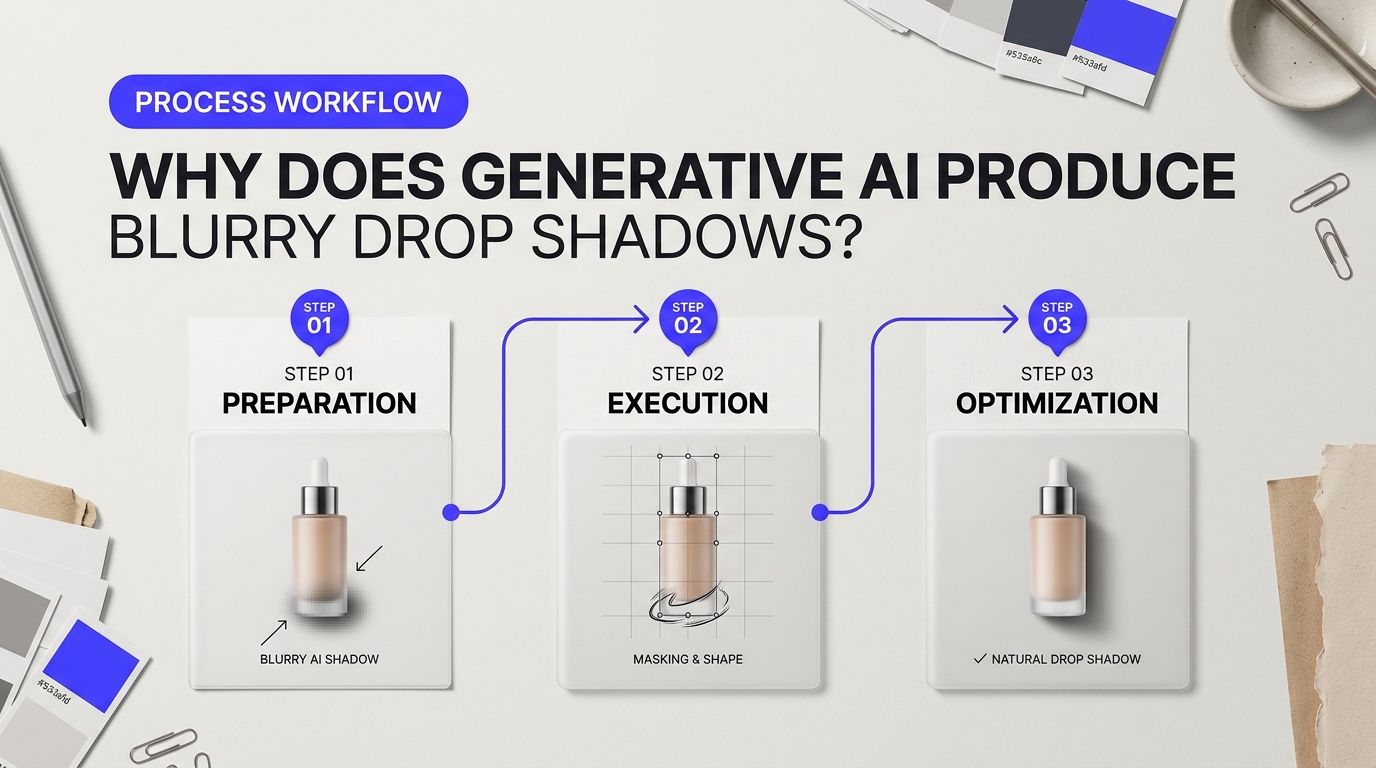
Generative AI doesn't understand physics. It doesn't calculate photon bounces, surface roughness, or real-world distances. Instead, it predicts pixel patterns based on millions of training images. When you ask a diffusion model to place a leather boot onto an oak table, it doesn't set up a virtual spotlight. It simply calculates which colors usually sit next to leather and wood. That basic shortcut is why generated drop shadows so often look like dirty gray smudges instead of crisp, believable contact points.
The Latent Space Compression Trap: Why We Must Fix Blurred AI Product Photo Shadows
Most commercial image generators rely on latent diffusion models. These models don't work on full-resolution files right away. They compress images into a condensed mathematical format using an encoder, run the denoising steps, and then decode the result back into visible pixels. Think of it like squishing an uncompressed audio file into a low-bitrate MP3 and trying to recover the highest violin notes later. You lose the finest details in the translation.
In physical studio photography, an object's sharpest shadow occurs at the exact line of contact—called the umbra. This contact shadow might only be two or three pixels wide. When an AI compresses an image, those two tiny pixels get blended into the surrounding surface. The diffusion process views those hard, dark edges as digital noise and smooths them away. When brands try to fix blurred ai product photo shadows, they often realize that prompt engineering alone can't bridge this gap because the underlying architecture is actively working against sharp, micro-contrast edges.
| Shadow Property | Physical Studio Photography | Generative AI Diffusion |
|---|---|---|
| Light Source | Single or paired directional strobes with measurable falloff. | Averaged probabilistic light synthesized from training data. |
| Contact Edge (Umbra) | Razor-sharp, dark, and tight against the product base. | Diffused, faded gray band caused by latent compression. |
| Ground Plane | Fixed geometric surface with clear spatial coordinates. | Illusionary plane with no mathematical depth awareness. |
| Edge Boundaries | Natural optical occlusion governed by ray tracing. | Prone to color bleed and muddy feathering artifacts. |
The problem gets worse when we look at the ground plane. Human photographers anchor a product to a concrete floor or shooting table. The model doesn't know what a floor is. It only knows that certain textures tend to sit beneath certain shapes. Without precise 3D spatial geometry, the model guesses the distance between the product base and the ground. If that guess is off by even a fraction of an inch, the shadow floats, stretches unnaturally, or melts into an incoherent gradient.
Upstream cutout masks create another major bottleneck. Most production pipelines use automated background removal tools to isolate the product before feeding it into the generative engine. These segmentation tools frequently apply subtle edge feathering—softening boundaries by two or three semi-transparent pixels to avoid jagged cuts. When the diffusion model generates light and dark values over those feathered edges, it blends the product's edge pixels with the background. The resulting bleed produces a gray, muddy halo where a crisp shadow should start.
"Automated cutouts look great until you drop them into a generation pipeline. The soft edges create this weird airbrushed smear underneath shoes and bottles that takes twice as long to clean up manually."
This pain point pops up constantly across Reddit e-commerce merchant discussions, where teams discover that fully automated shadow generation often looks artificial on white background catalog grids. The software tries to satisfy vague text prompts like "natural studio lighting" by averaging soft light from every angle at once. Instead of a distinct cast shadow with a clear light source, you get a muddy cloud that makes expensive products look cheap.
How to Diagnose Edge Bleed and Inconsistent Shadow Falloff on E-Commerce Catalogues
Look closely at the base of your product visual. When generative models composite a product onto a blank studio background, they don't calculate physical light bouncing across real surfaces. They predict pixel color patterns based on probability. This subtle difference is why generated visuals frequently look like cut-and-paste stickers floating in space.
E-commerce teams looking to fix blurred ai product photo shadows often struggle during catalog audits because visual defects appear in varied, unpredictable ways. As noted in discussions on e-commerce catalog consistency, brands often waste hours trying to decide whether an asset passes inspection or requires manual retouching. Catching these flaws before a visual reaches your storefront requires a systematic diagnostic framework.
Auditing Catalog Assets to Fix Blurred AI Product Photo Shadows
Most shadow issues fall into three distinct physical failures: missing contact points, directional contradictions, and improper edge falloff. Run every batch of AI-rendered product images through this visual inspection matrix to quickly isolate the root cause.
| Visual Anomaly | What The AI Did Wrong | The 5-Second Diagnostic Test | Severity Level |
|---|---|---|---|
| Floating Product (Zero AO) | Skipped ambient occlusion where the object meets the ground. | Zoom to 200% at the base. Can you see white space or pure softness under the product's edge? | High (Instant reject) |
| Gaussian Smudge | Applied uniform blur density across the entire shadow mask. | Check the shadow boundary nearest the item vs. furthest away. Are both equally fuzzy? | Medium (Requires sharpening) |
| Edge Bleed Halos | Blended background colors into product silhouettes during diffusion. | Look for gray or discolored fringes running along the high-contrast product edges. | High (Destroys clean cutouts) |
| Conflicting Light Vectors | Placed specular highlights and cast shadows on incompatible axes. | Trace an imaginary line from specular shine through the object. Does the shadow follow that line? | Medium (Visually jarring) |
Three Diagnostic Tests for Digital Asset Audits
You don't need a degree in lighting design to catch flawed generations. Use these three physical benchmarks to train your internal review team.
"If you can't tell where the product makes physical contact with the floor, your shopper's subconscious will tell them the photo is fake."
1. The Contact Patch Check (Ambient Occlusion)
Place an ordinary coffee mug on your desk. Right where the ceramic meets the laminate, you will see a razor-thin, dark line. That is ambient occlusion. Light cannot easily reach tight crevices. AI models frequently omit this line, replacing it with an airy, gray smudge. Without this dark anchor, cosmetics bottles, sneakers, and furniture appear to hover in midair. If the contact line is wider than two to three pixels or lighter than 85% black on a pure white backdrop, the shadow is broken.
2. The Penumbra Gradient Audit
Natural shadows operate in two zones: the umbra (the dark center close to the object) and the penumbra (the softer outer edge farther away). As a shadow stretches away from a product, it naturally broadens and softens. Generative tools frequently invert or flatten this rule. They render a uniform, milky haze resembling a standard 20-pixel Gaussian blur in Photoshop. When the edge closest to a shoe's heel shares the exact same softness as the edge six inches away, the eye detects an unnatural smudge instead of real floor depth.
3. The Specular Vector Alignment
Light travels in straight paths. If your product has a bright highlight reflection on its upper-left surface, the cast shadow must land toward the bottom-right. AI image generators often generate studio backdrops independently from product cutouts, casting shadows directly underneath or sideways despite directional lighting cues on the item itself. When reviewing grid displays on collection pages, scan your thumbnails together. If five products cast shadows to the right and three cast them straight down, your catalog loses visual cohesion.
Auditing Methods: Manual QA vs. Layer Decomposition
How should production teams catch these issues across thousands of SKUs? Two distinct approaches dominate catalog workflows:
- Manual Visual Scrubbing (Photoshop / Proofing Portals): Production artists inspect images one by one against a 50% gray background. Toggling a neutral gray layer under an isolated product immediately exposes gray edge halos and dirty drop shadows that blend invisibly into plain white backgrounds. This method is accurate but creates a massive bottleneck for teams managing weekly drops of 500+ assets.
- Automated Alpha Channel Analysis: High-throughput studios use automated scripts to inspect shadow alphas. By splitting the visual into its base cutout, ambient occlusion layer, and directional cast shadow, scripts can measure edge gradient falloff mathematically. If the alpha transition from 100% black to 0% transparency occurs over an identical pixel width along the entire perimeter, the asset is flagged for bad falloff.
Evaluating which workflow fits your store comes down to catalog size. Small boutique brands often find standard Photoshop actions sufficient for spot fixes. Scaled operations producing thousands of monthly variations need a dedicated shadow pipeline that programmatically separates the product cutout from generative lighting layers, preventing muddy edge bleed before the asset ever enters quality review.
Quick Workarounds to Fix Blurred AI Product Photo Shadows in Real Time
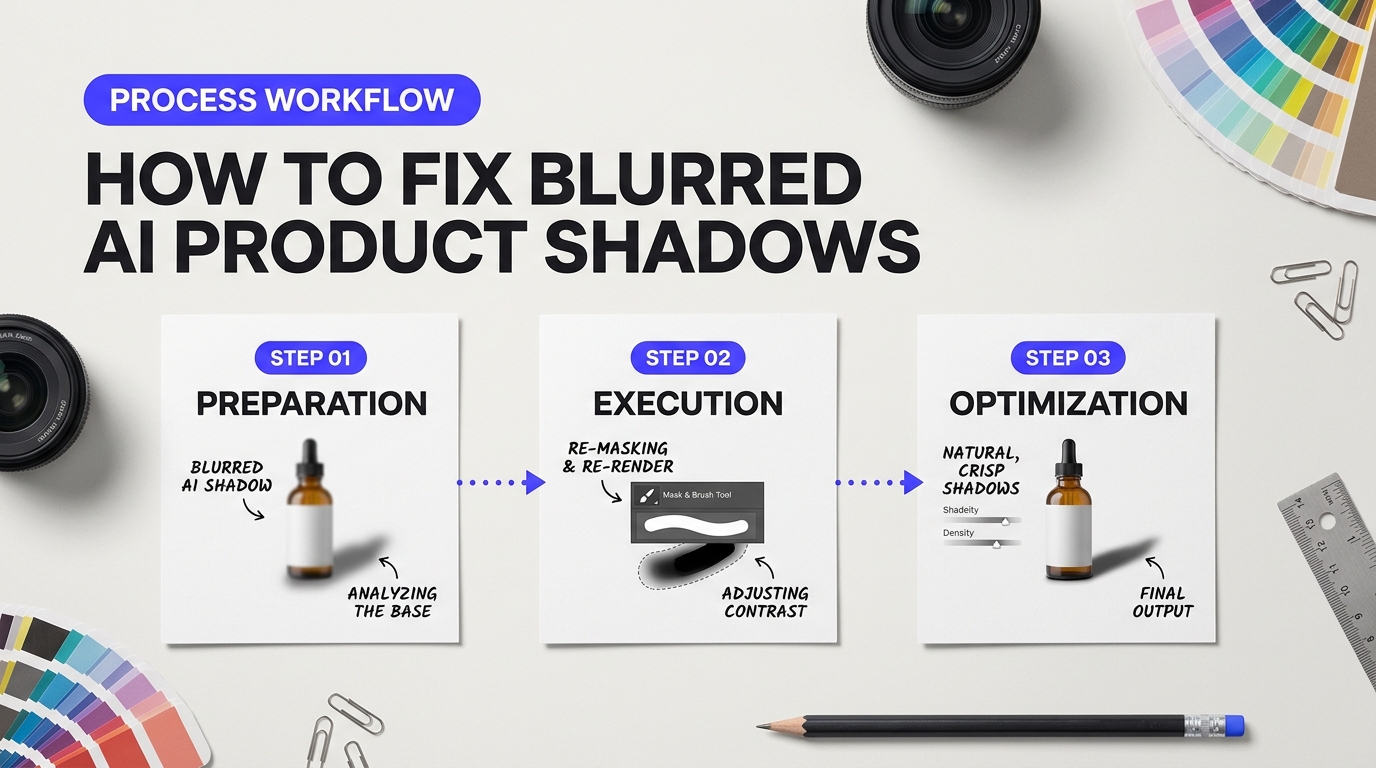
Re-rolling an entire generation batch drains time and computing credits. When a diffusion model turns a product shadow into a muddy, grey smudge, the product appears to float in mid-air. It looks cheap. Buyers notice this lack of weight immediately, even if they cannot name the technical glitch. When catalog deadlines loom, you need targeted adjustments that correct edge falloff instantly.
Prompt Directives to Fix Blurred AI Product Photo Shadows
Diffusion models often default to soft, ambient studio lighting because common training sets are full of diffused lightbox shots. Think of diffuse lighting like a foggy afternoon. Your shoes barely cast an outline on the pavement because light bounces from every angle at once. To anchor an object firmly on a tabletop, you need a point source—like direct sunlight hitting a sidewalk.
Replace generic lighting phrases with strict, hard-light photography terms. If your positive prompt contains phrases like "soft studio lighting" or "clean white background," the AI blends the shadow boundary until it loses structure.
Ineffective Prompt: "Skincare serum bottle on marble counter, studio lighting, hyperrealistic, clean shadows."
Corrective Prompt: "Skincare serum bottle standing on a solid marble counter, single hard directional spotlight from upper left, crisp cast shadow, sharp contact occlusion line at base, high contrast edge falloff."
Notice the specific mechanics. "Contact occlusion line" forces the model to darken the tiny slit where the bottle meets the marble. "Hard directional spotlight" prevents ambient light from washing out the shadow profile.
Negative prompts are just as vital when you need to fix blurred ai product photo shadows without restarting your generation pipeline from scratch. Feed these negative tokens directly into your sampler:
diffuse bloom, ambient haze, smudged contact pointfloating item, detached shadow, low contrast falloffdouble shadow, soft box glow, muddy edges
Real-Time Parameter and Tool Adjustments
Tweaking your prompt text is only half the battle. Generation settings heavily dictate edge sharpness. If your Classifier-Free Guidance (CFG) scale sits too low (between 3 and 5), the model treats your lighting instructions as loose suggestions, smoothing out the dark tones. Pushing CFG to 7.5 or 8.5 forces the neural net to follow the hard-edge commands strictly. Keep an eye on edge burning; going past 10 will create unnatural neon fringing around the product perimeter.
For store owners comparing generation costs against manual retouching, store managers often ask whether native AI generation beats a hybrid workflow. In discussions among e-commerce operators debating AI rendering consistency, teams consistently find that running infinite re-rolls for the "perfect shadow" yields diminishing returns. A rapid, hybrid workflow is far faster.
If the render produces clean product packaging but leaves the contact shadow blurry, fix it in post-production within sixty seconds instead of re-generating:
- The Photoshop Curves Burn: Duplicate the base layer, set the blend mode to Multiply, and add a black layer mask. Use a small, soft brush at 30% flow to paint directly beneath the product base. This darkens the blurred gray zone into a true ambient occlusion shadow.
- Photoroom Batch Shadow Engine: If you use dedicated background replacement tools like Photoroom or Claid.ai, bypass generative ground shadows entirely. Strip the background clean, then apply their built-in 2D hard-drop shadow presets. These calculate artificial sun angles with mathematically sharp boundaries rather than probabilistic diffusion guesses.
Applying these adjustments during generation—or right after it—stops edge bleed before it pollutes your live product listings.
A Step-by-Step Pipeline for Generating Crisp, Photorealistic Shadows at Scale
Single-prompt AI generation rarely gets physical lighting right. When an AI model tries to render a product, a studio backdrop, and realistic physics all at once, it compromises. The result is almost always a cloudy, gray smudge under the item that screams amateur production. To consistently fix blurred AI product photo shadows across thousands of catalog assets, you cannot rely on a single generative roll of the dice. You need a dedicated, automated multi-pass pipeline that separates your product from its ground plane, calculates physical light trajectories, and re-composites the shadow using math rather than guesswork.
A Production Pipeline to Fix Blurred AI Product Photo Shadows
Think of your photo pipeline like a movie visual effects studio. Digital artists never render the actor and the background explosion in the same raw pass. They isolate every layer so they have full control over the lighting. That same principle applies to e-commerce catalogs.
Here is how a production-grade shadow pipeline works from start to finish:
- Pass 1: Sub-Pixel Subject Isolation. You cannot cast a sharp shadow from a fuzzy border. The pipeline begins by extracting the product using modern segmentation models like BiRefNet or RMBG-1.4. This creates a clean, 32-bit alpha mask that preserves hard plastic boundaries, translucent glassware, and micro-fibers without edge fringing.
- Pass 2: Contact Occlusion Generation. Real objects sit firmly on ground surfaces. Where the shoe sole or cosmetic jar makes physical contact with the plane, almost no light penetrates. The system generates a tight, dark "contact shadow" (ambient occlusion) directly beneath the base pixels, usually extending only 2 to 5 pixels out. This roots the item instantly so it never looks floaty.
- Pass 3: Directional Cast Plane Projection. Instead of asking an AI to paint a cast shadow, project the isolated silhouette along a geometric vector matching your catalog's standardized light angle (for example, 45 degrees top-left). Transforming the shape along an artificial ground plane gives you mathematically straight, authentic perspective lines.
- Pass 4: Progressive Blur and Opacity Attenuation. Light spreads out as it travels away from an object. As the shadow moves farther from the product base, an automated directional blur expands the shadow edge (the penumbra), while the overall opacity fades according to an inverse-square curve.
- Pass 5: Photometric Blending. Shadows are not flat black paint; they are the absence of light tinted by ambient bounce. The pipeline composites the attenuated shadow layer over your target background using a Multiply blend mode, slightly tinted to match the color temperature of your brand studio background.
| Method | Edge Definition | Batch Speed | Visual Consistency |
|---|---|---|---|
| Single-Shot AI Prompting | Muddy, haloed, smeared | Fast (2–4s per image) | Unpredictable across SKUs |
| Manual Photoshop Retouching | Crisp, highly realistic | Slow (5–15 min per image) | Depends on editor skill |
| Automated Multi-Pass Pipeline | Razor-sharp base with natural falloff | Fast (under 1s per image) | 100% matched across the catalog |
Evaluating Tools: Headless Scripts vs. Specialized APIs
How you build this pipeline depends entirely on your technical resources and daily volume. E-commerce teams generally choose between two standard approaches: building an internal script using Python and OpenCV or routing assets through specialized background APIs.
For brands with an in-house engineering team, an automated script running headless Blender or an image processing stack (like Pillow or OpenCV) offers total control. You can lock in exact light coordinates, export pristine TIFF files, and eliminate recurring per-image API costs. However, engineering overhead is real. Many brands discover that maintaining an internal microservice eats up valuable developer sprints that should go toward improving customer checkout flows.
If you lack internal infrastructure, dedicated e-commerce photo APIs like Photoroom or Claid.ai offer pre-tuned shadow passes out of the box. As noted by retailers discussing shadow generation pipelines on Reddit, third-party APIs save weeks of setup time, but you must evaluate per-image API rates carefully once your catalog scales past 20,000 active SKUs.
"The fastest way to spot an untrustworthy e-commerce store is the floating product syndrome. If the drop shadow looks like someone sprayed an airbrush behind the item, buyers subconsciously assume the product is fake."
Fine-Tuning the Penumbra for Different Materials
One setting will not fit every product category. A soft leather handbag needs a slightly wider, softer shadow spread because ambient light wraps around its matte, curved sides. In contrast, a stainless steel watch or a clear glass bottle demands hard contact edges and tight highlight kickback on the ground plane.
Set up categorized presets in your pipeline config. Group items into hard-surface, soft-goods, and transparent containers. By applying category-specific falloff radiuses, your final catalog maintains studio authenticity without requiring a human designer to inspect every single frame.
Best Practices for Preventing Shadow Artifacts Across Large-Scale AI Product Catalogs
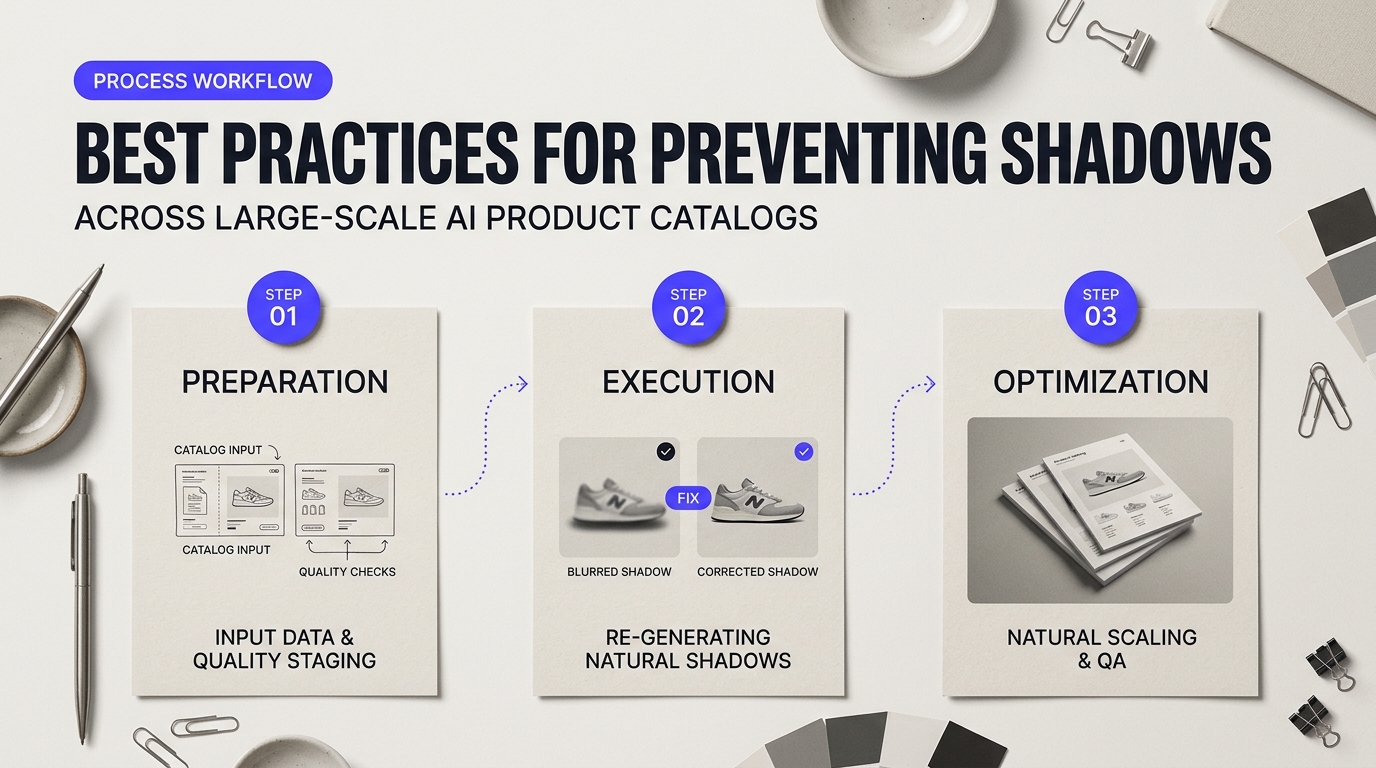
Tackling twenty product images by hand is easy. Managing ten thousand SKUs across an enterprise catalog is a completely different beast. When an e-commerce brand scales automated visual rendering, shadow degradation is not just an artistic quirk. It becomes an operational bottleneck. As digital merchandising teams frequently note in a Reddit discussion on catalog automation consistency, chasing down haloing, smudged drop shadows, and floating objects manually will erase any profit margins you gained from generative AI.
Preventing blur requires discipline at the system level. Building automated safeguards is the only reliable way to fix blurred ai product photo shadows before they contaminate your production feed. You must treat shadow generation like an assembly line, where inputs, transformations, and output inspections follow fixed tolerances.
Operational Protocols to Fix Blurred AI Product Photo Shadows at Source
Generative models build shadows by calculating spatial edges and predicting ground planes. If your input cutout has fuzzy boundaries, the diffusion model hallucinates muddy patches instead of realistic light falloff. Think of it like handing an illustrator a smudged pencil sketch. You can't expect clean ink lines if the original reference is indistinct.
To keep shadows sharp across tens of thousands of renders, enforce strict input standards across your photography supply chain:
- Uniform Clipping Paths: Use vector-based alpha masks rather than automated low-contrast cutouts. Crisp mask edges provide the model with a clear spatial boundary for calculating ambient occlusion.
- Standardized Camera Elevations: Lock capture angles (such as a fixed 15-degree down-angle). When camera perspectives vary wildly within a category, the model struggles to identify where the floor actually sits.
- Neutralized Base Lighting: Strip harsh multi-directional light from the raw product shot. Conflicting real-world lighting confuses the synthetic engine, resulting in smeared, overlapping shadow planes.
Maintaining Brand-Level Prompt and Conditioning Presets
Free-form prompting is the enemy of catalog consistency. If five retouchers or engineers use slightly different phrases to describe floor contact, your store pages will look fragmented. One item will sit on a razor-sharp hard shadow, while the adjacent item floats over a milky gray cloud.
Lock your lighting parameters using modular prompt architectures. Separate the product prompt from the scene physics. Your lighting prompt block should specify direct light angles, surface reflectivity, and decay rates:
"Cast contact shadow, hard occlusion rim beneath base, 45-degree directional key light, zero ambient diffusion bleed, matte commercial tabletop reflection."
Pair these text presets with geometric conditioning. If you use tools like ComfyUI or Stable Diffusion pipelines, lock your ControlNet depth maps. Depth maps anchor the spatial relationship between the bottom edge of the product and the surface plane. This prevents the diffusion process from melting the contact point into a blurry soup.
Catalog Production Workflow Comparison
| Production Strategy | Edge Definition | Throughput Speed | Labor Overhead |
|---|---|---|---|
| Manual Photoshop Actions | High (Crisp vectors) | Slow (50–100 images/day) | High design costs |
| Raw Generative Diffusion | Unstable (Prone to blur) | Instant (Thousands/hour) | High review and rework rates |
| Constrained Multi-Pass Pipeline | Photorealistic & Sharp | Fast (Batch API scalable) | Low (Automated validation) |
Automating Quality Assurance Before Channel Sync
Don't rely on human eyes to spot muddy shadows across thousands of catalog updates. Human reviewers get tired. Blurry patches slip through to live storefronts, hurting buyer trust.
Set up an automated quality gate using simple programmatic image analysis before pushing assets to Shopify, Amazon, or your product information management system. A lightweight Python script running edge-detection filters (such as a Sobel or Laplacian operator) along the lower quadrant of an image can evaluate contrast gradients. If the pixel transition between the product base and the ground surface is too soft, the script flags the image for re-rendering.
By enforcing clean source cutouts, rigid prompt structures, and automated edge inspection, you build a resilient pipeline. The result is a unified storefront where every product rests naturally on crisp, photorealistic grounding.
Scaling Studio-Quality AI Visuals Without Sacrificing Brand Integrity
Visual trust drives digital checkouts. When shoppers evaluate an expensive handbag, a skincare serum, or running shoes, their eyes instinctively hunt for tiny visual cues that prove the product actually exists in physical space. Floating products kill customer confidence. Muddy, indistinct smudges beneath an item tell the shopper's subconscious brain that something is fake, edited, or cheap.
Most generative diffusion models treat light like statistical noise rather than genuine geometry. That is why they spread dark pixels like greasy butter across a clean surface instead of calculating true ray tracing. If you run a high-volume storefront, generating hundreds of visual assets daily with these hazy halos will quietly erode your brand reputation.
Mastering Contact Physics to Fix Blurred AI Product Photo Shadows
Automated visual pipelines shouldn't force you into a compromise between throughput and realism. Many retail managers on Reddit e-commerce discussions on visual consistency discover that blindly automating product renders creates an editing backlog that wipes out their initial time savings. When your creative team has to manually clean up edge bleeds in post-production, the automation has failed.
The fix comes down to separating your layers before passing assets through generative models. Instead of relying on a single prompt to render the item and its ground environment at once, smart workflows split the workload:
- Isolate contact geometry: Keep the tight contact shadow—the ambient occlusion—pinned directly to the base of the product cut-out so the item feels weighted and anchored.
- Control the soft cast shadow: Generate the directional drop shadow on an independent alpha channel where you can dial in Gaussian diffusion, opacity, and light angle across an entire SKU collection.
- Match environmental bounce: Softly tint the edge of the contact shadow with the surface hue to simulate how real-world studio lights bounce off colored tabletops.
Off-the-shelf tools like Photoroom handle quick, single-item background removals well for marketplaces, but scaling an enterprise catalog requires custom node-based pipelines like ComfyUI with depth maps or dedicated shadow-compositing actions. This hybrid approach gives you batch-processing speed while preserving sharp edge boundaries.
A product photograph doesn't need complex sets to convince buyers; it just needs shadows that obey the basic laws of physical space.
Clean shadows take deliberate effort. Learning how to fix blurred ai product photo shadows isn't just about polishing aesthetic details; it directly protects your operating margins by keeping return rates low and conversion rates predictable. Set your lighting rules, lock your shadow falloff profiles, and let physics guide your automated visual production.